
Chapter 3
Journaling starter Kit
for Beginners

Chapter 3:
Essential – Day-to-Day Management
In this chapter, I will also list other essentials, but as you will notice, the last two are called “optional.” This is because, unlike the essentials we just covered, I realised that two of the pages presented here can be essential for many, but not for everyone.
The Daily Page
The daily page gives you space for reflections, planning, notes, reminders, photos, and anything else you want to jot down, related to the day or not. “Similar” to a diary (but not the same), this may be a big chunk of your journal after the Essentials and Special Pages (explained later) that you decide to start with.
I advise you not to “pre-format” anything, but in particular I suggest you not to write the Daily Pages in advance as there will be days when you want to write a lot and days when you don’t want to write at all.
If you prepare one or two months in advance, not only will it seem exhausting, but you will limit one of the fundamental peculiarities of journaling: Freedom, Flexibility and Creativity factor that journaling gives you the opportunity to exercise.
How to use it:
- Every day consider whether you need to add notes or reflections related to things to do, some prefer to write in the morning, others in the evening. There is no rule. You will write according to your commitments and your activities.
- If you use your journal as a planning and work tool it could be that during the day you will preferably write to do lists, short or long notes, then in the evening you could write a summary reflection on your day.
- If, on the other hand, you use your journal as a reflection tool, you could write your intentions in the morning and in the evening summarily report how your day went.
- If you write reflections or notes that are of some relevance to you, remember to add your page to the index, give the page a title that is significant to you, in this way you will be able to find your reflections quickly.
- On the day page you can also simply doodle, draw, attach photographs or stickers, in short, it is a kingdom in which you have absolute power.
- If one day you don’t have the words, use another medium to express yourself.
- Remember, you don’t have to write if you don’t want to; it’s not mandatory to write something every day.
Optional Time management tools: The Monthly calendar
The following two suggested tools are called “optional” because, depending on your personal use, they might not be necessary for your practice. My advice is to give them a try anyway. Evaluate over a month or two if you don’t use them, and if that’s the case, stop using them. You might find them useful in the future.
Again, “be minimal and keep it as simple as possible” is my motto.
If you want to add decorations or use more color, you’re free to do so, as long as the time dedicated isn’t excessive and doesn’t lead you to procrastinate or never create a monthly calendar.
My monthly calendar is quick, it takes less than a minute to write it by hand.
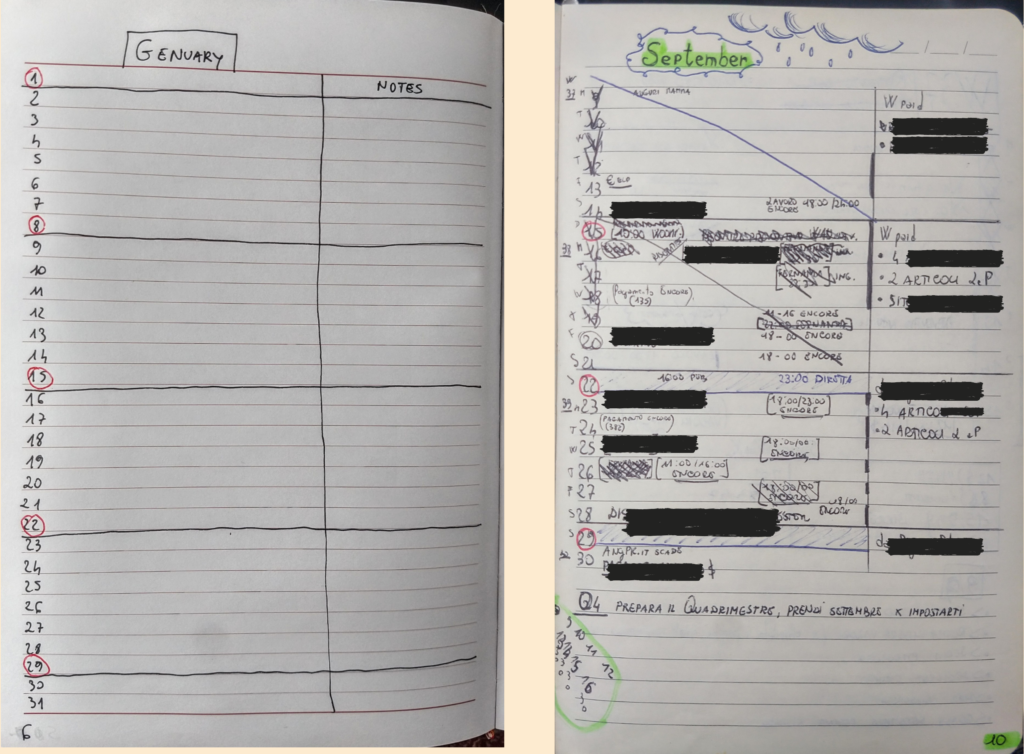
- Write the name of the month at the top of the page and the days of the month, one on each line (if you have lines).
- If you want, you can circle the Sundays and draw a line to divide the weeks.
- You can also decide to leave some space for notes.
- You can usually fit a full month on a regular A5 page, in one or two columns, but you can decide to use two pages if you are busy or if your journal is smaller.
How to use it:
- You should prepare your monthly calendar on the first day of the month, but even a few days before or a few days after is ok.
- Add the calendar page number to your index;
- Check the Year Calendar and copy all the deadlines for the month in the Monthly Calendar: anniversaries, commitments. In this way you will have them at hand and you will remember them better;
- If necessary for some particular event, write a short note in the notes section (if you have decided to add one).
- If it is a complex event that requires structured organization, create an “event page” in your journal where you can explore ideas, to do lists, reflections, expenses, etc related to that event;
- If you have a commitment to write for a month that you haven’t written yet, write it down in the Year Calendar.
Optional Time management tools: The week
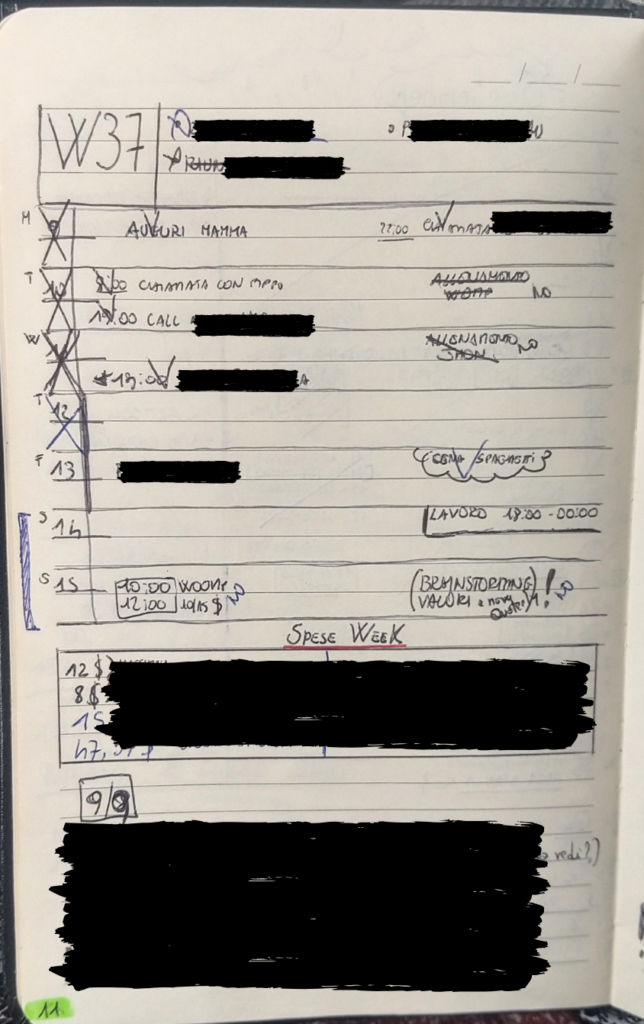
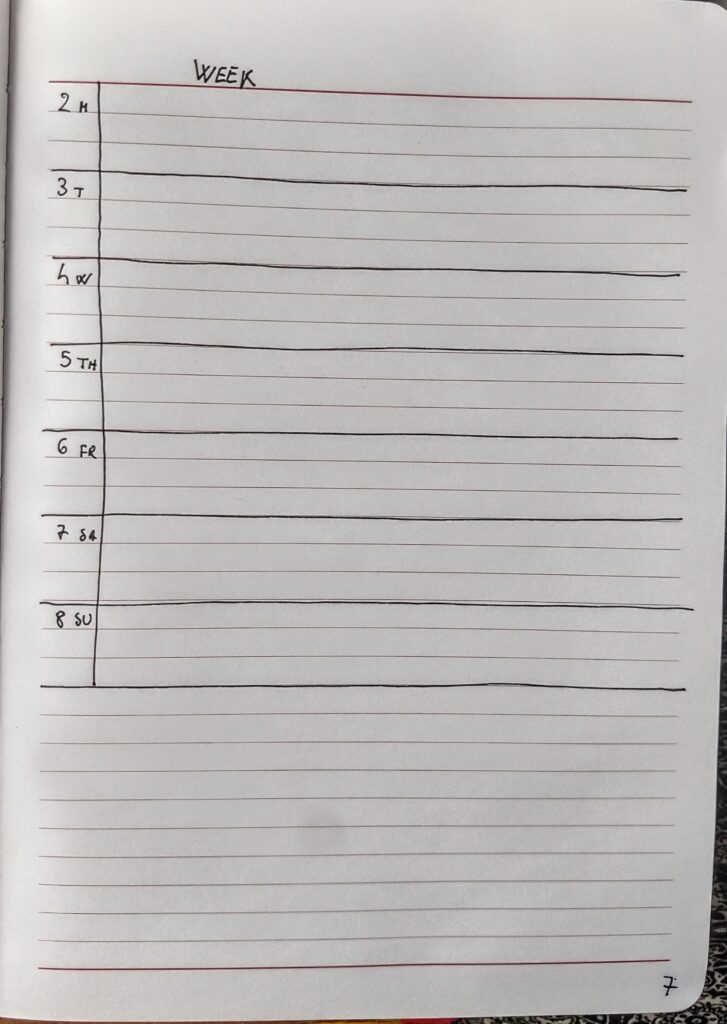
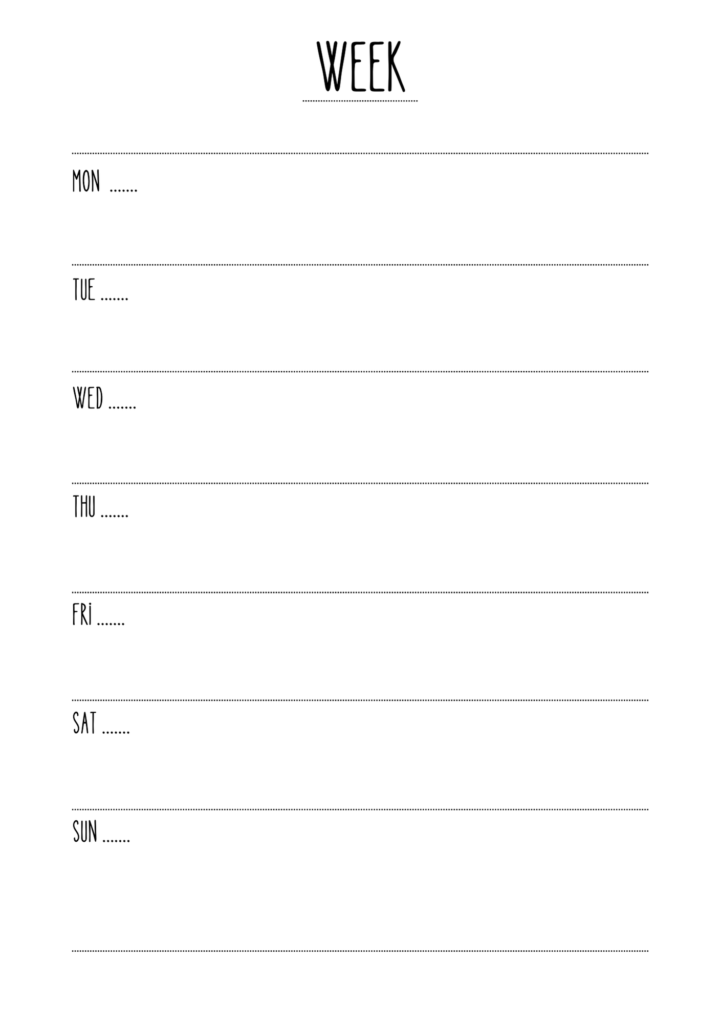
The week is a deepening of the month, and it is absolutely optional, like the other elements it can be both simple and more elaborate.
Some examples follow.

Note:
I’m an Italian native speaker, so in some examples you may find some text in Italian. But it doesn’t matter, because what I want to show you is simply the design.
Personally, I only use the week page when I have particular projects or when I have ALOT of commitments and need more structure for that week.
There was a time when I experimented with different types of Page of the Week (you can see some examples in the picture above), and it was very useful to me in my former freelance job.
I won’t lie, I initially wasted a lot of time preparing very elaborate week pages, and very often was not necessary. Then my weekly pages gradually became more minimal until they disappeared completely from my journal.
The beauty of the journal is also this, if you no longer need something, stop filling it out. Flexibility!
How to use it:
- Usually the week is best written the day before it starts, for me it’s Sunday, but it depends on when it is better for you.
- Once you have written your week, look at your monthly calendar and copy the appointments you have for each day. With this added space you can be more descriptive. Depending on the layout you decide on, you can dedicate extra space for notes for each day.
- It might seem tedious to copy down appointments every time, but rest assured that this way, you won’t forget them. And your sense of time will improve significantly.
NOTE:
The guide you are reading is based on the assumption that in the beginning you will only fill out the basic pages which we have talked about so far, and that you will write everything else as time goes on or when you will feel ready.
Don’t be tempted to prepare all twelve monthly calendars, all week pages, and all day pages in advance, because it can become a titanic undertaking and discourage you.
It is also not necessary because the journal grows with you, step by step.
The index is instrumental here.
In the next chapters I will introduce the Special Pages.
Give it a read without feeling obligated to add the following pages to your journal, but if you decide to do so, I recommend not exceeding 3 special pages if you’re a complete beginner, the ones that you consider the most important for you at this stage.
After a few months of practice, you can read again this guide and decide to add more.
Remember that every special page you add should be included in the index. This way, you keep it in mind, don’t lose track of it in your journal, and increase the likelihood of establishing the habit of using it regularly.
Chapter 4:
Alright, congratulations! These were the basics.
Now, let’s move on to the next level—We’ll talk about “special pages” and how to use them for your personal growth!
If you have any questions about this section, feel free to leave me a comment.
See you in the next chapter!

Sign up for the newsletter.
Stay updated on new articles and initiatives from Journaling Now.
